*Stampin' in a winter wonderland*
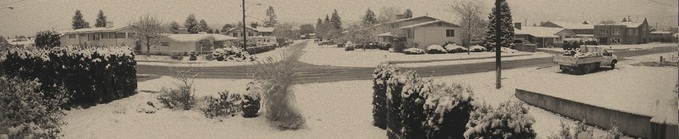
Thats what I felt like this weekend. The snow JUST KEPT coming DOWN!
The boys and I had a grand time with snow angels and making snowmen and shoveling the driveway. And we cleaned off the car with a snowball fight. The snow was so wet that it made immediate snowballs - PERFECT!
Here's a photo out my front window before all the footprints and snowball making.
For post number 5 of my 10 weeks of Christmas series, I want to highlight some VERY easy card and gift tag projects.
Snow Festival Designer Tags Kit
| | 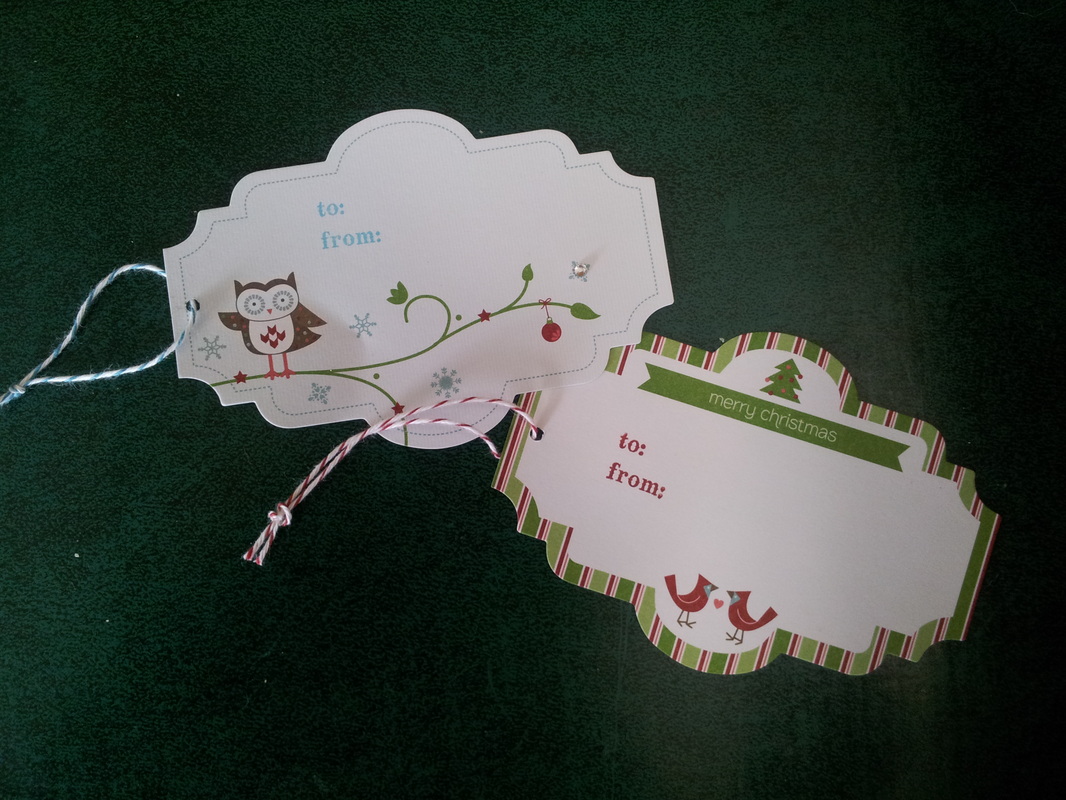 Snow Festival Designer Printed Tags - 25 double-sided tags for $4.95 |
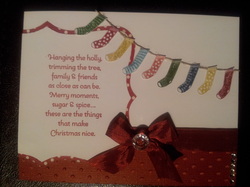
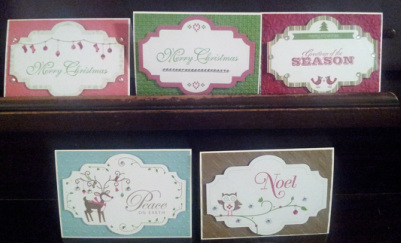
The Snow Festival Designer Printed Tags are great for Christmas cards or tags. To make it even easier, you are able to order the cards in a kit. Each kit comes with 20 white notecards and envelopes, a package of snow festival designer printed tags, a package of rhinestones and coordinating cut embossed cardstock to make 20 cards. Kit is $25 and available until December 14th. I found the Greetings of the Season stamps perfectly coordinate with this project.
Snow Festival Designer Series Paper
| | 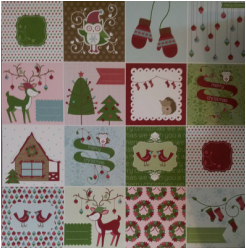 Snow Festival Designer Series Paper - 12 sheets for $13.50 |
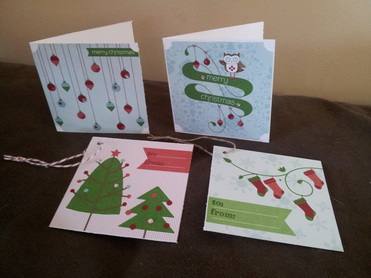
The Snow Festival Designer Series Paper comes with 12 double-sided sheets of printed paper (two each of six designs). Two of the sheets have 16 3x3 squares (see upper right) that are perfect for little cards and tags. The easiest way to make the cards is to cut 12 x 12 white cardstock into 8 pieces each measuring 6" x 3" and then adhere the square. For the tags just punch a hole in the corner and add "to" "from". With these two sheets you can make 32 cards and tags. You will also have additional paper left over to make other cards and tags or to use in a Christmas album.
With these easy projects my hope is that you won't have to miss out on a minute of all the snowy fun :)
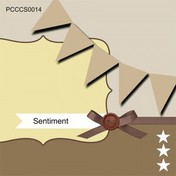
This week is the Grand Opening of the Paper Craft Crew Challenges and here is
their sketch. There have been many that have just fit my bill and I like
this one a lot too.
And here is my version. Didn't it turn out great? I used the Owl Occassions stamp for the stockings and More Merry Messages for the sentiment. I took a risk as I don't ever use a sentiment as the focus point of a card, but I love it for this layout.

That's right it is time again for 10 Weeks of Christmas Post #4!!
When you are ready to go out to cut down your Christmas tree from the woods (unless you cut your tree down from the box in the garage like many right-minded city-dwelling individuals) you will undoubtedly consider the proper tool fo the job, and not go at that woody stump with a steak knife, but with a nice sharp ax. This is enable you to complete the job in an appropriate amount of time and do less damage both to yourself and to the tree.
For this weeks post I wanted to tell you all about the exclusive new Stampin Trimmer. It has just become available and it is a tool that every paper-crafter needs to have at their fingertips. It is the sharp ax in the toolshed...now you see where I was going with that.
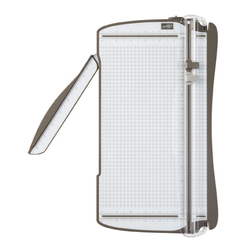
This nifty gadget is not only cuts, but scores too! It has a full 12" cutting
track so that you can cut and score full 12" sheets of designer paper or
cardstock. It has extra space on the top and the bottom for both the cutting and scoring blades so both can be on the track at the same time.
The Stampin Trimmer also has an extended measuring base of 6 1/4" which provides you with a larger work area and means that you can make common cuts and scores without using the extendable arm. The extendable ruler arm pulls out and extends to 15 1/2" for all your cutting and measuring needs. The rulers have increments down to 1/16" and the grid lines are 1/4"
There is also a handy dandy storage compartment under the base to store extra blades and other tools for when you travel to a crop.
I will admit that I have been waiting not so patiently for the Stampin' Trimmer since I got the new annual catalog in May. The cutter I had was cheap and flimsy and small and inadequate in every way. I was embarrased to use it in front of people. So, I was heaps of happy when we were finally able to order the new Trimmer. And I find mine so convenient. Not only can I score and cut with one product it also works so slick and smooth. Once you try it you won't go back.
To get yourself a shiny new ax to cut down the perfect Christmas tree I would recommend
Home Depot. But if you would like to order the new Stampin Trimmer (126889) it is $41.95 (plus shipping and taxes...unless you order it in your customizable starter kit which has no shipping and taxes).
Let me know what you think of the new trimmer in the comments below.
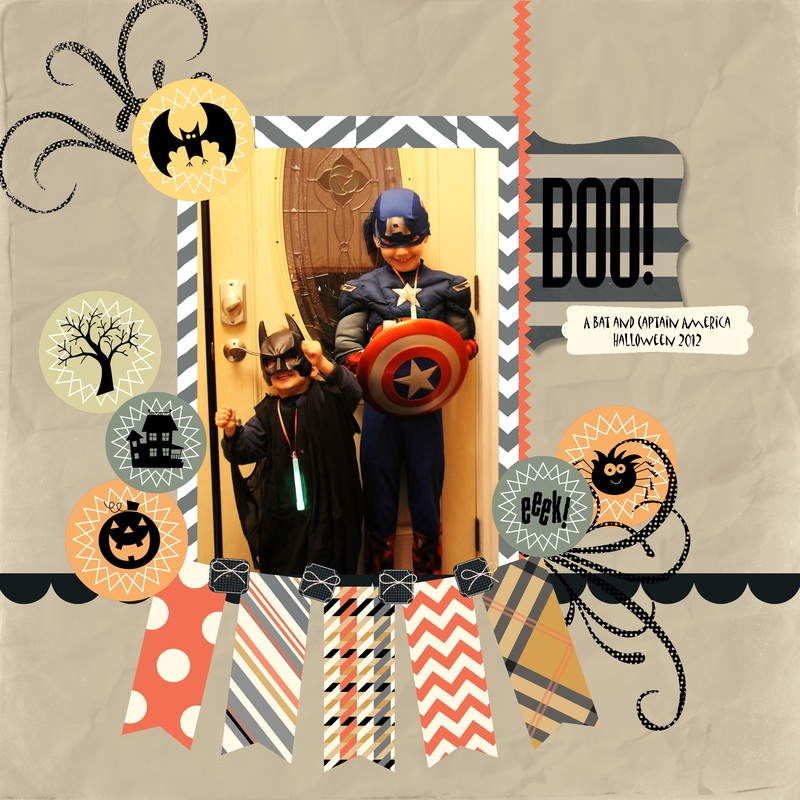
Wanted to share a pic of my favourite little goblins. Here they are just before heading out for some good old fashioned trick-or-treatin'. Don't they look super? Hope everyone had a fun and safe halloween :)
Btw, this is the absolute fastest I have EVER scrapbooked a photo! Lovin' my MDS 2+!

For my 10 Weeks of Christmas Post #3 I want to let you know that Digital Scrapbooking Day is this Sunday November 5th. You know that extra hour you're gonna get? Now you know how to use it :)
My Digital Studio 2 (or MDS2) is the digital software from Stampin' Up that you can use to create projects on your computer. The 10 weeks of Christmas logo is one example of things that I have created, but you can create scrapbook pages, calendars, cards, photobooks, swatchbooks, facebook banners, and whatever else your imagination and creativity can dream up.
Some of the things that I think are unique about digital designing are:
1. it takes up MUCH less space than regular crafting - all your supplies are in your computer.
2. it is SO easy to create and complete a beautiful project using the designer templates - you can literally drag and drop pictures and add your personalized text and be done.
3. it takes NO EXTRA TIME to make multiple items - you design one card (or calendar or photobook) and you can print it multiple times.
4. it is VERY portable - when you download to a laptop you can take it with you wherever you go.
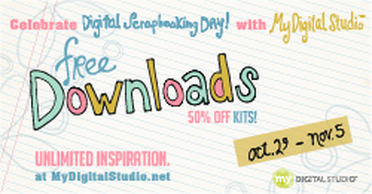
If there is a week for you to delve in and give it a try... this is it. You can download a
FREE trial of My Digital Studio 2 software here. Then you can download
three FREE downloads here. And then you can
get 50% off most digital kids here.
To get started using your free My Digital Studio 2 trial you can check out
www.mydigitalstudio.net for lots of short tutorials, tips, and project ideas so that you can start creating today! Or I am happy to help you learn more about the software at my next free MDS class (next Wednesday, November 7th at 7pm).
If you are considering creating projects for Christmas (and why wouldn't you be) then just circle
December 3rd on your calendar, because you will want to order your products by then to have them delivered in time for Christmas. It is also worth mentioning that printing your creations is totaly affordable. Stampin' Up just recently reduced printing costs of all products by half and the quality is bar-none!
This week not only takes all the fear out of trying (it's FREE for Pete's sake) but we also have an excuse to try because it is Digital Scrapbooking Day this Sunday. You can share what you create by posting a comment below.
Go on. Pour a coffee. Press the Download now button. Jump in. There's nothing to lose and a fun, new creative outlet to gain.
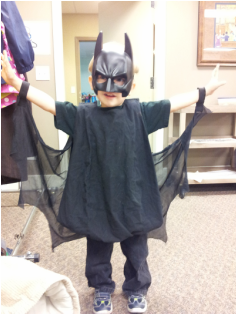
My little guy as a Bat for Halloween.
Stampin' Up is having a Spooktacular Stamp Sale for ONE DAY ONLY! On Monday, October 20th ALL stamps will be 15% off! This includes all the stamps in the annual catalog, all the stamps in the holiday catalog, background stamps, cookie stamps, personalized name stamps, and even the brand new single stamps!
To celebrate I am inviting EVERYONE over to stamp a card and enjoy some apple cider while browsing through the catalogs on Monday evening from 5-9pm. And for every stamp set you order you get an entry into a draw to be the Monday Mystery Hostess, who will get all of the hostess benefits for the day - minimum $35 in free product!
So, take a look at what you need for your holiday project lists, gift-giving lists, and your wish list!
Monday is going to be the best stamp day ever!
So much for it just starting to feel like fall because today we have SNOW?!?!
While there are certainly reasons to complain and feel begrudgingly toward the cold white stuff I have instead forced myself to think of the things I like about snow. The main won is that it can be very peaceful, beautiful, shimmery, and sparkly.
For this 10 weeks of Christmas #2 post I wanted to feature some of my favourite bling that make people go, "Wow!"
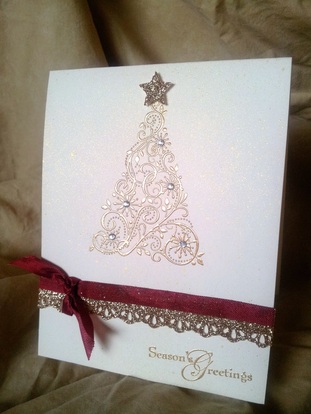
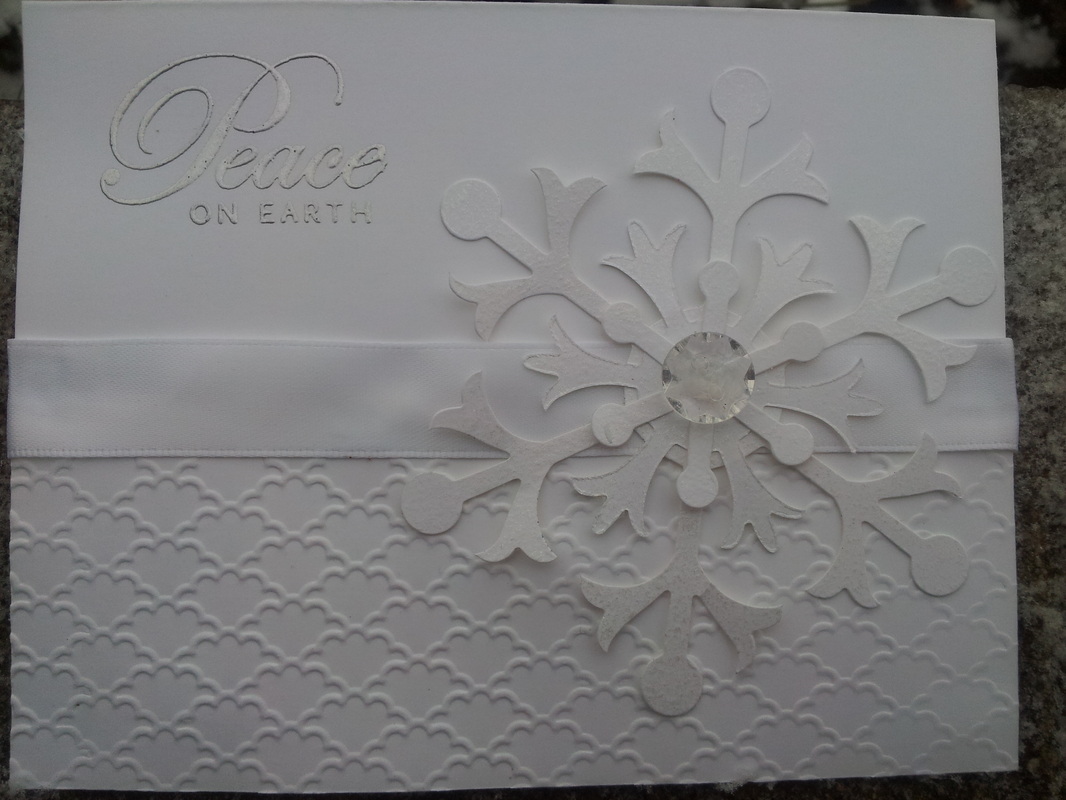
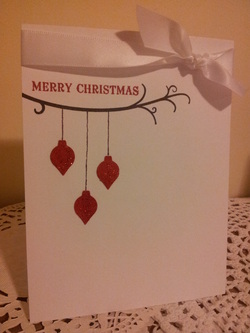
For this Christmas card I began with a very vanilla base and used the Snow Swirled stamp set. I inked the tree stamp and greeting with the Versamark pad and then sprinkled gold embossing powder over the stamped images. I then used my heat tool to melt the powder to create that gorgeous shiny raised image that you can see in the photo.
I love the Shaz-aam that Glimmer Paper provides. I used the Champagne Glimmer Paper from the Holiday Catalog and cut it out with the Finishing Touches Edgelit with the Big Shot. I then wrapped it with the Cherry Cobbler Seam Binding Ribbon for a little colour.
To finish the tree I punched a Champagne Glimmer star using the Holidays Minis Star Punch and adhered it to the top. Then I added Rhinestones to the centre of all of he stars in the tree. Rhinestones are such an easy way to add sparkle to any project.
The finale for this card is the Gold Glow Smooch Spritz that provides the subtle shimmery background.
This card was inspired by
Retrosketches #34 and the
Made Especially for you Misting Challenge. It is, for sure, the most sparkly project I have ever attempted and I must say, I love it!
I hope this inspires you to bling up your holiday projects and you are welcome to share them with me in the comments below :)
I feel hibernative; ready to curl up with a cup of tea and settle in for a long winter. I am genetically pre-disposed to this, my Mom hibernates too. Obviously I tend towards year-round crafting, but for others I would say that this is the season for crafting. People are coming indoors, and there is time to make personalized gifts and cards for the holidays. Ahhhh, it's a good time of year.
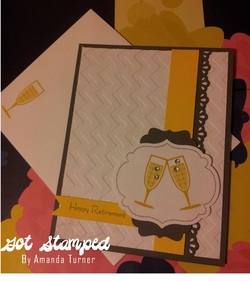
And if you believe that the life cycle is similar to the cycle of a year, then I would say that retirement is similar to the fall. For me, I imagine summer as that busy time in life where you are working and raising kids, and doing "the adult thing" and then fall comes with it's gentle changes when you have time for the things you enjoy.
My husband asked me to make a Retirement card for a couple who had both recently retired. I wanted to make it about the two of them and not too feminine or masculine. I was told that they are young-spirited and full of fun, so I also didn't want to make it old and stodgy. I was inspired by Connie Babbert over at Inkspired Treasures. My take is over there -> I knew I wanted to use the Happy Hour stamp set and they grey and yellow combination I felt was perfect for a couple. How about you? Do you like the fall? How do you picture your retirement? Mine I think will include a lot of crafting :) | |


 RSS Feed