We're not in Kansas anymore. Thats right this technique is in a league of its own. This is one of the projects I prepared for wax paper Wednesday, my technique class this month.
The modge podge holds the embossed shape crisply. Then the wax paper and distressed ink gives it such a cool rustic and vintagey look. This technique involves:
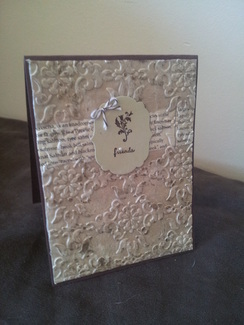
1. Modge podge crumpled wax paper and a strip of ripped First Edition Specialty Designer Paper onto a piece of crumb cake cardstock.
2. Productively occupy yourself while it dries.
3. Run it through the Big Shot with an embossing folder...for this card I used the Vintage Wallpaper folder.
4. Rough it up with the sanding blocks - the more you sand the more the ink will have a place to stick.
5. You guessed it - use a sponge and rub some ink on.
6. Take turns sanding and inking until you get the look you want.
7. Mount it onto a folded Early Espresso Cardstock card.
To finish it off I cut out a piece of river rock with the Labels Framelit and stamped with the Tiny Tags set with Early Espresso ink and tied a bow with the Espresso Espresso Bakers Twine. Last, but not least the "i" in friends got a nice little pearl accent. Ta da!


 RSS Feed